There’s nothing quite like the transformative power of a new chandelier. It’s the jewelry of a room, a focal point that catches the eye and elevates your entire design. But before you can bask in its glow, you’ve got to get it up there. For many homeowners, the thought of electrical work can feel daunting, and you might wonder if you can really install your new chandelier yourself. The good news is, with careful planning and a step-by-step approach, you absolutely can handle this project. We’re going to walk through how to safely install a new chandelier, ensuring everything goes smoothly from start to finish.
Before You Begin: Planning to Install Your New Chandelier
Before you even touch a screwdriver, you’ll want to do a little prep work. This isn’t just about gathering tools, it’s about understanding the scope of your project. You’ll need to confirm your existing electrical box can support the new fixture and that you have all the right parts.
Assessing Your Space and Fixture Weight
First things first, check your ceiling box. Most standard ceiling boxes are rated for fixtures up to 50 pounds. If your new chandelier weighs more than that, you’re going to need a different, heavier-duty box, often a brace-style box that mounts between joists. Don’t skip this step, it’s crucial for safety. A beautiful but falling chandelier is nobody’s idea of good decor. In my experience, the number one error people make is underestimating the weight and stability required. If you’re replacing a small pendant with a grand, multi-tiered chandelier, you’ll definitely need to check the weight rating.
You should also measure your space. For instance, in a dining room, a chandelier’s diameter should generally be about half the width of your dining table. It’s helpful to know these things before you start so you’re not surprised later.
Gathering Your Tools and Supplies
You don’t want to be halfway through the job only to realize you’re missing a key tool. Here’s a list of what you’ll likely need to install your new chandelier:
- Voltage tester (non-contact is easiest)
- Phillips head and flathead screwdrivers
- Wire strippers
- Pliers (needle-nose and lineman’s are good)
- Electrical tape
- Wire nuts (usually included with the fixture, but it’s good to have extras)
- Sturdy stepladder or scaffolding (don’t use a wobbly chair!)
- Pencil
- Measuring tape
- Your new chandelier (unboxed, with all parts laid out)
- An extra set of hands (a friend or family member for heavy fixtures)
Safety First: Cutting the Power
This is the most critical step. You’re working with electricity, and you don’t want any surprises. Go to your electrical panel (breaker box) and find the circuit breaker that controls the light fixture you’re replacing or the area where you’ll install your new chandelier. Flip it to the “off” position.
It’s a good idea to tape the breaker switch in the off position, too. This prevents someone from accidentally flipping it back on while you’re working. Then, return to the fixture location and use your voltage tester to confirm that the power is indeed off. Touch the tester to the wires in the ceiling box. If it lights up or beeps, the power is still on, and you need to go back to the breaker box.
Expert Tip: For anything involving new wiring, moving an electrical box, or a chandelier weighing over 50 pounds, I’d strongly recommend hiring a licensed electrician in your area. They’re experts, they know the local codes, and it’s worth every penny for peace of mind and safety. Don’t hesitate to call them if you’re unsure.
The Safe Removal of Your Old Fixture (If Applicable)
If you’re replacing an existing light, you’ll need to carefully take down the old one. Once the power is confirmed off:
- Remove the canopy: This is the decorative cover that sits flush against the ceiling. It’s usually held by nuts, screws, or a decorative collar. Unscrew or unlatch it to expose the wiring.
- Disconnect the wires: You’ll see three sets of wires: black (hot), white (neutral), and green or bare copper (ground). These will be connected with wire nuts. Carefully twist off the wire nuts and separate the wires. Take a picture with your phone if it helps you remember which color goes where, though they’re pretty standard.
- Unmount the old fixture: Once the wires are disconnected, the old fixture will be held by a mounting bracket. Unscrew the bracket from the ceiling box, making sure you have a good grip on the fixture so it doesn’t fall.
- Inspect the ceiling box: Take a look at the electrical box and the wires coming out of it. Make sure everything looks clean and in good condition. If the box looks damaged or loose, that’s another reason to call an electrician.

Installing the Mounting Bracket for Your New Chandelier
Every chandelier comes with its own specific mounting bracket. Don’t try to reuse your old one unless it’s identical and designed for your new fixture’s weight.
- Attach the crossbar: Your new chandelier will come with a metal crossbar or mounting plate. This piece screws directly into the electrical box in the ceiling. Make sure it’s tight and secure. It’s crucial that this part is solid, as it’s what your entire fixture will hang from.
- Adjust the mounting screws: Many brackets have threaded screws that stick out. These are what the chandelier’s canopy will attach to. You’ll likely need to adjust their length to ensure the canopy sits flush against the ceiling when you’re done. A good trick is to hold the canopy up to the bracket and eyeball how far the screws need to extend.
Prepare to Install Your New Chandelier
This is a good time to get your chandelier ready. Assemble any arms or decorative elements according to the manufacturer’s instructions, but don’t install the bulbs yet. If your chandelier has a long chain, you’ll need to determine the correct hanging height. For a dining room, the bottom of the chandelier should be about 30-36 inches above the tabletop. In an entryway, it’s usually at least 7 feet from the floor, or higher if you have tall ceilings. You’ll shorten the chain by opening links with two pairs of pliers.
Wiring Your New Chandelier: Making the Connections
This is where you connect the electrical components. Don’t rush this part. Double-check every connection.
- Support the fixture: If your chandelier is heavy, have your helper support it, or if it has a chain, you can temporarily hook the chain onto the mounting bracket while you make the connections. This takes the strain off your hands.
- Connect the ground wire: The ground wire is usually bare copper or green. Connect the ground wire from your ceiling box to the ground wire from your chandelier (and to the grounding screw on the mounting bracket, if present). Twist these wires together and secure them with a wire nut.
- Connect the neutral wire: The neutral wire is typically white. Connect the white wire from your ceiling box to the white wire from your chandelier. Twist them together and secure with a wire nut.
- Connect the hot wire: The hot wire is usually black. Connect the black wire from your ceiling box to the black wire from your chandelier. Twist them together and secure with a wire nut.
- Tuck the wires: Once all connections are made and secure, gently fold the wires up into the electrical box. Make sure no bare wire is showing outside of the wire nuts. This is essential for safety.
Again, for anything involving new wiring, if you’re unsure about the wire colors, or if you encounter any wiring that looks old, frayed, or confusing, please call a licensed electrician. They can safely resolve any issues and ensure your connections are up to code. It’s always better to be safe than sorry when dealing with electricity.
Attaching and Securing Your Chandelier
Now for the exciting part, getting your beautiful new light fixture fully in place. If you’re shopping for a new dining room fixture, our chandelier collection has a range of options at different price points, from classic designs to modern statements.
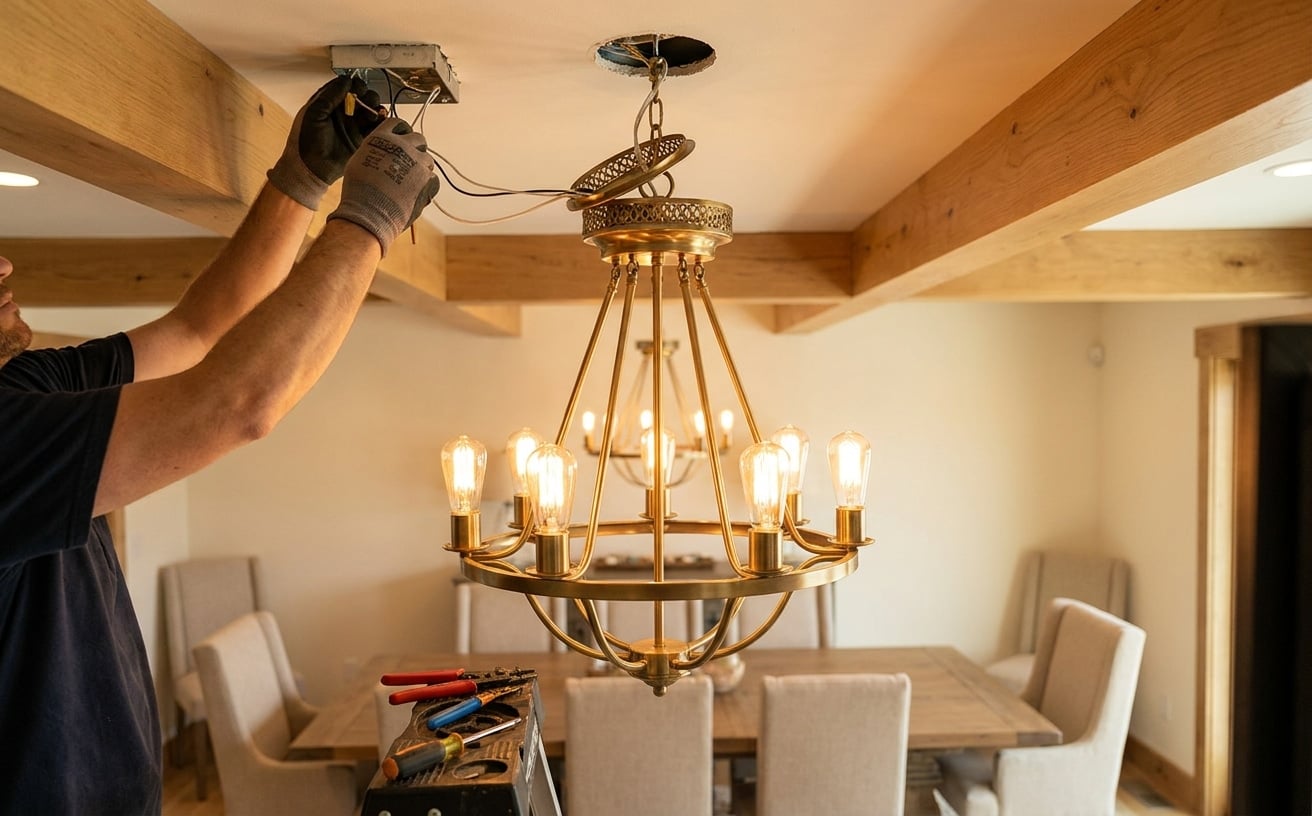
- Mount the chandelier to the bracket: Carefully lift the chandelier and align the canopy with the mounting screws you adjusted earlier. Push the canopy up against the ceiling.
- Secure the canopy: Use the decorative nuts or screws provided to secure the canopy tightly against the ceiling. You want it to be flush, with no gaps. Don’t overtighten, but make sure it’s snug.
- Install the bulbs: Once the chandelier is securely mounted, you can install the light bulbs. Use the correct wattage and type specified by the manufacturer.
- Add decorative elements: If your chandelier has crystals, shades, or other decorative elements, now is the time to attach them. This is often the most time-consuming part, but it’s where your fixture truly comes to life.
Final Steps and Testing Your New Chandelier Installation
You’re almost there! It’s time to bring power back to your new fixture.
- Restore power: Go back to your electrical panel and flip the circuit breaker back to the “on” position.
- Test the light: Return to your room and flip the light switch. If everything was connected correctly, your new chandelier should illuminate! If it doesn’t, turn the power off immediately and recheck your wiring connections. Sometimes a wire nut isn’t quite tight enough.
What if it doesn’t work?
- No power: Check the breaker again. Is it fully “on”?
- Loose connection: Turn power off, then check all wire nuts. Make sure the wires are twisted tightly together before applying the nut.
- Wrong bulb: Are the bulbs the correct type and wattage? Are they screwed in fully?
- Fixture defect: In rare cases, there could be an issue with the chandelier itself.
Successfully installing your new chandelier is a rewarding experience. Take your time, prioritize safety, and enjoy the beautiful new centerpiece in your room.
Frequently Asked Questions
How heavy of a chandelier can I install myself?
Most residential ceiling electrical boxes are rated to support up to 50 pounds. If your new chandelier weighs more than that, you’ll need a special heavy-duty brace or box installed between the ceiling joists. For anything over 50 pounds, it’s best to consult a licensed electrician to ensure proper and safe installation.
What if my wires aren’t the standard colors?
While most wiring follows a standard (black for hot, white for neutral, bare/green for ground), older homes or non-standard installations can sometimes differ. If you encounter wires that aren’t clearly identifiable, or if you’re unsure about any connection, it’s always safest to stop and call a licensed electrician. They can properly identify the wires and ensure a safe hookup.
Can I install a dimmer switch with my new chandelier?
Yes, most chandeliers are compatible with dimmer switches, but you’ll need to make sure your bulbs are also dimmable. LED bulbs require specific LED-compatible dimmer switches. Always check the bulb and fixture specifications to ensure compatibility before installing a dimmer. It’s a great way to control the ambiance in your room.
How do I clean my chandelier after installation?
Once your chandelier is installed, regular dusting with a feather duster or microfiber cloth will keep it sparkling. For a deeper clean, turn off the power, then use a damp, soft cloth with a mild glass cleaner (for glass or crystal) or a gentle all-purpose cleaner (for metal parts). Avoid spraying directly onto the fixture to prevent liquid from getting into electrical components.
Installing your new chandelier can be a fantastic DIY project that truly transforms your home. With these steps, you’re well-equipped to tackle it. If you’re still looking for the perfect fixture, feel free to browse our full collection and find the one that speaks to you.