Imagine you’re standing in your living room, or maybe your master bedroom, on a warm afternoon. You’re thinking, “This space would be so much more comfortable with a ceiling fan.” It’s a common thought. But then you look up and realize there’s no existing wiring, just a blank ceiling or perhaps a simple light fixture that hardly moves any air. This ceiling fan no wiring dilemma can feel like a big hurdle, making you think your dream of a breezy room is out of reach. Don’t worry, it’s a challenge many homeowners face, and I’m here to tell you it’s not impossible. There are practical ways to solve this, and we’ll walk through how to install a ceiling fan no wiring from several angles.
The Challenge: Installing a Ceiling Fan Where No Wiring Exists
It’s frustrating, isn’t it? You’ve got the perfect spot, maybe a cozy den or a spacious kitchen, but the only thing missing is that cool breeze. A ceiling fan no wiring situation typically means you don’t have a junction box in the ceiling at all, or perhaps you only have a basic light fixture that isn’t rated to support the weight or electrical demands of a fan. You might think your only option is to live without one, or embark on a major electrical renovation. But that’s not always the case. We’ll explore solutions that range from calling in a pro to clever DIY workarounds that make a ceiling fan possible, even without existing dedicated wiring.
Why You’d Want a Ceiling Fan (Even Without Existing Wiring)
Let’s be honest, ceiling fans aren’t just about moving air anymore. They’re a significant design element, too. They can anchor a room’s decor, adding a touch of modern sophistication or rustic charm. Beyond aesthetics, though, the functional benefits are huge.
- Comfort: A ceiling fan creates a wind-chill effect, making a room feel significantly cooler, often by several degrees. This is invaluable in warmer months.
- Energy Savings: When you’re running a ceiling fan, you can often set your thermostat a few degrees higher without sacrificing comfort. This translates directly to lower electricity bills, which is a win-win in my book.
- Lighting: Many ceiling fans come with integrated lighting, offering dual functionality. This can be especially useful if your room needs an overhead light source.
- Air Circulation: They help distribute air evenly throughout a room, preventing stuffiness and improving overall air quality.
- Style: From sleek, contemporary designs to classic, ornate fixtures, there’s a ceiling fan to match any interior style. Our ceiling fan collection has a range of options at different price points if you’re shopping for a new ceiling fan.
So, even if you’re starting with a ceiling fan no wiring scenario, the benefits make finding a solution well worth the effort.
Crucial Considerations Before Tackling Your Ceiling Fan No Wiring Project
Before you even think about buying a fan or pulling out tools, you’ve got to assess your space. Skipping this step can lead to frustration, or worse, a safety hazard. It’s really important to get these basics right.
Room Size and Fan Dimensions
Getting the fan size right is crucial for both aesthetics and performance. A fan that’s too small won’t cool effectively, and one that’s too large can overpower a room.
- Small Rooms (up to 75 sq ft, e.g., 8×9 ft bedroom): Look for fans around 30-48 inches in diameter.
- Medium Rooms (76-144 sq ft, e.g., 10×12 ft office): A 48-52 inch fan is usually ideal.
- Large Rooms (145-225 sq ft, e.g., 14×16 ft living room): You’ll want a 52-60 inch fan.
- Great Rooms (over 225 sq ft): Consider fans 60 inches or larger, or even multiple fans.
Ceiling Height and Fan Downrod
Safety and comfort dictate minimum ceiling height. The fan blades should be at least 7 feet (84 inches) from the floor. If your ceiling is 8 feet high, you’ll likely need a flush-mount fan or one with a very short downrod. For higher ceilings (9 feet or more), a longer downrod will bring the fan down to an effective height, usually around 8-9 feet from the floor.
Structural Support
This is absolutely non-negotiable. Ceiling fans are heavy and they vibrate. You can’t just screw them into drywall. They must be securely mounted to a ceiling joist or a fan-rated electrical box that is specifically braced for a fan. A standard light fixture box won’t cut it; it’s just not strong enough to safely support the weight and movement of a ceiling fan. If you don’t have a joist or a suitable box, you’ll need to install a fan-rated brace.
Expert Tip: Don’t guess about structural support. Most fan-rated electrical boxes are designed to span between joists. If you’re unsure if your existing light box is fan-rated, assume it’s not. It’s much safer to replace it with a new, braced fan box.
Safety First: For anything involving new wiring, reinforcing a ceiling for a heavy fixture, or working inside your breaker panel, I’d strongly recommend hiring a licensed electrician in your area. It’s worth every penny for peace of mind and to ensure everything meets local building codes and safety standards. Electrical work isn’t something to take lightly.
Your Options for a Ceiling Fan No Wiring Installation
Alright, so you’ve assessed your space and you’re ready to make it happen. Here’s how to install a ceiling fan no wiring, breaking down the main approaches. Each has its pros and cons, and what’s right for you will depend on your comfort level with DIY and your budget.
Option 1: Running New Wiring
This is the most traditional and often the most permanent solution for a ceiling fan no wiring situation. It involves bringing a dedicated electrical circuit from your breaker panel to the ceiling location where you want the fan.
| Pros | Cons |
|---|---|
| Dedicated power source | Most expensive option |
| Full control (wall switch) | Requires opening walls/ceilings |
| Safest, most reliable | Complex, often needs a pro |
| No visible cords | Can be messy and disruptive |

How it works: An electrician will usually find the nearest power source (often another circuit in the attic or a wall) or run new wire directly from your home’s main electrical panel. They’ll snake the wire through walls, ceilings, or attic spaces to the desired fan location. At the fan location, they’ll install a new, fan-rated electrical box and connect it to the new wiring. Then, they’ll install a wall switch to control the fan and any integrated lights.
My honest advice: This is the best long-term solution, especially if you plan to stay in your home for a while. However, unless you’re a very experienced DIYer with electrical knowledge, this is definitely a job for a licensed electrician. They understand wire sizing, circuit loading, and local electrical codes, which are critical for safety. I’ve seen this go wrong when homeowners try to tap into overloaded circuits or don’t properly ground new wiring, creating a real fire hazard.
Option 2: Utilizing an Existing Light Fixture (with Wireless Controls)
This is a very popular DIY solution for a ceiling fan no wiring problem, assuming you do have an existing overhead light fixture in the right spot. You’re not “adding” new wiring, but rather repurposing the existing light’s power for the fan. The key here is using a fan with wireless remote control capabilities.
How it works: You’ll remove the existing light fixture. Crucially, you’ll need to replace the standard light fixture electrical box with a fan-rated electrical box that’s securely braced. Then, you’ll connect the ceiling fan’s wiring (and its wireless receiver) to the existing power wires that used to power your light. The fan will typically come with a remote control, and sometimes a wall-mounted remote cradle, allowing you to control fan speeds and lights without needing new wall switches.
Important Note: The existing light fixture must be controlled by a wall switch. If it’s a pull-chain light, you won’t have the convenience of controlling the fan from the wall, only the remote. However, some newer fan kits offer wireless wall switches that can be mounted anywhere, providing a clean look without cutting into drywall. This can truly solve the ceiling fan no wiring control problem.
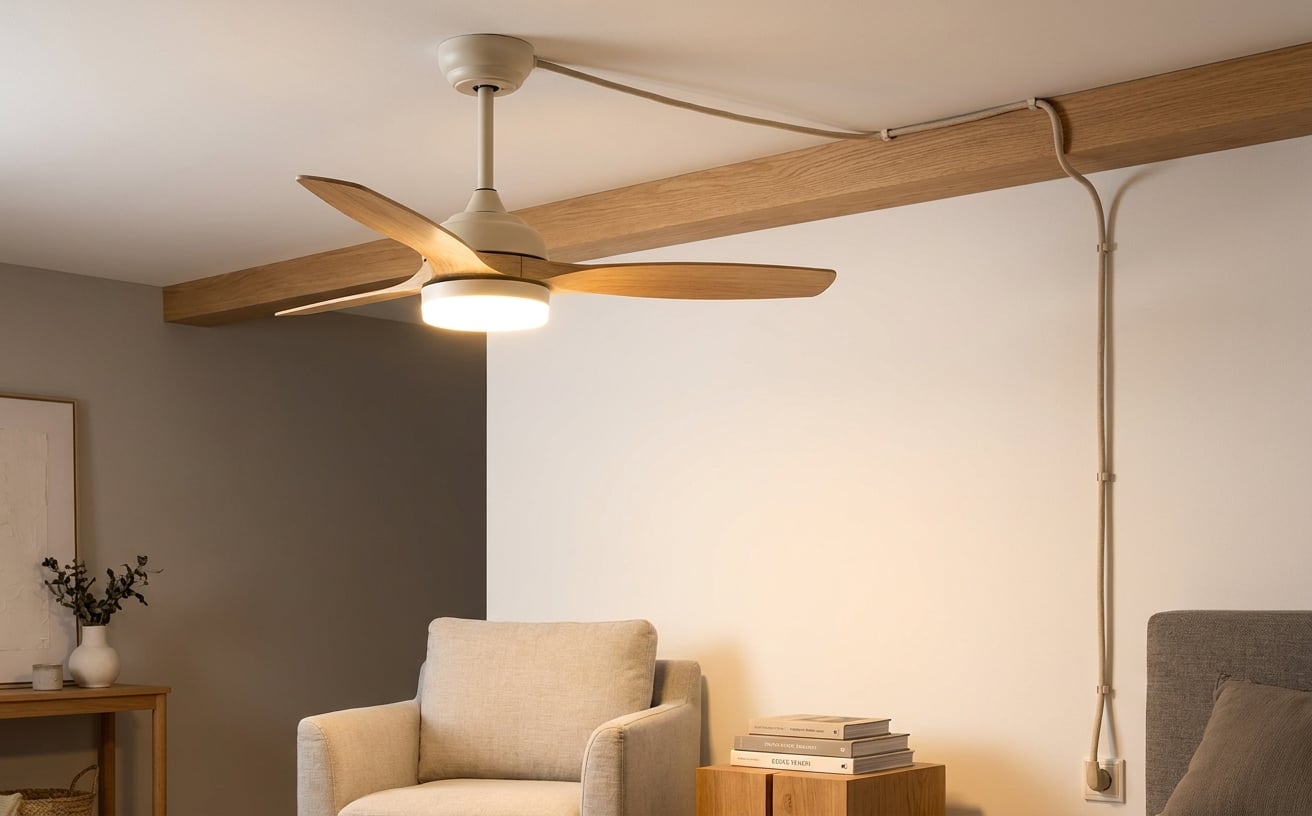
Option 3: Plug-In Ceiling Fans
If you’re looking for the absolute easiest, no-fuss solution for a ceiling fan no wiring situation, plug-in fans are an option. They’re exactly what they sound like: a ceiling fan that plugs into a standard wall outlet.
| Pros | Cons |
|---|---|
| Easiest installation | Visible power cord |
| No electrical work needed | Less integrated look |
| Portable (can move) | Limited placement options |
| Great for renters | Less powerful than wired fans |
How it works: These fans usually hang from a hook or a simple bracket screwed into a ceiling joist (still need structural support!). A long power cord runs from the fan down the wall to a nearby electrical outlet. Some even come with an optional remote control for convenience.
Considerations: While super easy, they don’t offer the clean, integrated look of a hardwired fan. The visible cord can be an eyesore, and you’ll need to manage it carefully to prevent tripping hazards. They’re often best for temporary solutions, garages, or rooms where aesthetics aren’t the top priority.
Step-by-Step: How to Install a Ceiling Fan No Wiring Using an Existing Light’s Power
This section focuses on the most common DIY approach: converting an existing switched light fixture into a fan power source using a wireless remote system. This is a great way to handle how to install ceiling fan no wiring without major electrical overhauls.
Disclaimer: Always turn off the power at your breaker box before beginning any electrical work. Test the wires with a non-contact voltage tester to confirm they are dead. If you’re uncomfortable at any point, please call a licensed electrician.
Preparing for Your Ceiling Fan No Wiring Project
-
Gather Your Tools and Materials:
- New ceiling fan with wireless remote control
- Fan-rated electrical box with brace (retrofit style if no attic access)
- Screwdriver set (Phillips and flathead)
- Wire strippers/cutters
- Non-contact voltage tester
- Pliers
- Ladder
- Measuring tape
- Pencil
- Safety glasses
-
Turn Off the Power: Go to your home’s main electrical panel and locate the circuit breaker that controls the light fixture you’ll be replacing. Flip it to the “OFF” position. It’s always a good idea to put a piece of tape over the breaker or a “DO NOT TOUCH” sign to prevent accidental turn-on.
-
Remove the Old Fixture: Carefully unscrew and remove the old light fixture from the ceiling. Disconnect the wires, noting which is hot (usually black), neutral (white), and ground (bare copper or green).
-
Install the Fan-Rated Electrical Box: This is a crucial step for your
ceiling fan no wiringsolution.- If your existing box isn’t fan-rated, remove it.
- Install the new fan-rated electrical box and brace. If you have attic access, you can install a sturdy wooden block between two joists and then attach a standard fan box. If not, a retrofit fan brace is your best friend. These typically insert through the existing hole in the ceiling, expand to brace themselves against the joists, and then a new fan box attaches to them. Follow the manufacturer’s instructions carefully. Ensure it’s rock-solid; it won’t be able to support the fan if it wiggles.
Installing the Fan Bracket and Wiring the Receiver
- Mount the Fan Hanging Bracket: The fan will come with a metal mounting bracket. Secure this bracket directly to the new fan-rated electrical box using the screws provided. Make sure it’s tight and stable.
- Connect the Fan to the Power Source (and Wireless Receiver): This is where your
ceiling fan no wiringsolution truly comes together. Your new fan will likely have a wireless receiver that needs to be wired in-line with the fan’s power.- Identify wires: You should have a black (hot), white (neutral), and bare copper/green (ground) wire coming from your ceiling. Your fan and its receiver will have similar wires.
- Ground wires: Connect the bare copper/green ground wire from the ceiling to the ground wire from the fan (and receiver, if it has one) using a wire nut.
- Neutral wires: Connect the white neutral wire from the ceiling to the white neutral wire from the fan and the white neutral wire from the receiver using a wire nut.
- Hot wires: This is where the receiver comes in. Connect the black hot wire from the ceiling to the black wire input on your wireless receiver. Then, connect the black wire output from the receiver to the black wire on the ceiling fan itself. The receiver essentially acts as a switch between the ceiling’s hot wire and the fan’s hot wire.
- Light wires (if applicable): If your fan has an integrated light, the receiver will also have a blue wire output for the light. Connect this blue wire from the receiver to the blue (or sometimes black) wire for the fan’s light kit.
- Carefully tuck all wires and the receiver up into the electrical box.
Assembling and Testing Your New Ceiling Fan
-
Assemble the Fan Blades and Housing: Follow your fan’s specific instructions for assembling the motor housing, attaching the fan blades, and installing any light kits or glass shades. This usually involves lifting the fan motor assembly onto the hanging bracket (often there’s a hook to temporarily hold it while you connect wires).
-
Test the Fan and Wireless Controls: Once everything is assembled and secure, go back to your breaker panel and turn the power back on.
- Use your fan’s remote control to test all functions: fan speeds, light on/off, and any dimming features.
- Make sure the wall switch (if you’re using the existing light switch) also controls power to the fan. It should effectively turn the entire fan unit on or off, with the remote handling the individual functions.
Choosing the Perfect Fan for Your Newly Wired (or Wirelessly Controlled) Space
Now that you know how to install ceiling fan no wiring, or at least how to get power to it, the fun part begins: choosing the fan! It’s not just about functionality; it’s about finding a fan that enhances your home’s style.
- Style: Do you prefer a sleek, modern fan with hidden blades, a rustic farmhouse look with distressed wood, or a classic traditional fan with intricate details? Consider the existing decor in your room.
- Features: Do you need integrated lighting? Dimmable lights? Reversible blades for winter (to push warm air down)? Smart home integration with voice control? A hand-held remote control is almost a standard feature these days, especially when you’re dealing with a
ceiling fan no wiringsetup that relies on an existing light switch. - Blade Material: Wood, plastic, or metal each offer different aesthetics and durability.
- Motor Type: DC motors are typically more energy-efficient and quieter than AC motors, though they might cost a bit more upfront.
Take your time to explore options. The right ceiling fan can truly transform a room’s comfort and appearance.
Frequently Asked Questions
Can I put a ceiling fan where there’s only a regular light fixture?
Yes, you absolutely can. This is one of the most common ways to solve the ceiling fan no wiring problem. You’ll need to remove the existing light fixture and replace its electrical box with a fan-rated box that can support the weight and movement of a fan. Then, you’ll wire the fan to the existing power, often using a wireless remote control system for convenience.
Do plug-in ceiling fans work well for every room?
Plug-in ceiling fans are a quick and easy solution, especially for renters or temporary situations where you can’t alter wiring. However, they aren’t ideal for every room. The visible power cord can be a trip hazard and isn’t the most aesthetically pleasing. They also typically offer less powerful airflow than hardwired fans, and their placement is limited by outlet proximity.
How do I know what size ceiling fan I need?
Measure your room’s square footage (length multiplied by width). For rooms up to 75 sq ft, a 30-48 inch fan is usually good. For 76-144 sq ft, aim for 48-52 inches. Larger rooms (145-225 sq ft) often need 52-60 inch fans, and anything bigger might require multiple fans or an extra-large model. Blade clearance from the floor should be at least 7 feet.
Is it always safe to install a ceiling fan myself?
While many homeowners can tackle replacing an existing light with a fan if the electrical box is already fan-rated, installing a ceiling fan no wiring from scratch or running new electrical lines is a different story. If you’re dealing with new wiring, installing new electrical boxes, or working inside your home’s breaker panel, it’s always safest and most advisable to hire a licensed electrician. They’ll ensure everything is up to code and, most importantly, safe.
Overcoming the challenge of a ceiling fan no wiring situation is totally achievable, whether you opt for a professional installation or a clever wireless solution. Don’t let the lack of existing wiring keep you from enjoying the comfort and style a ceiling fan can bring to your home. Explore our collection today to find the perfect fan for your space.