Updating your bathroom is one of the most satisfying home projects, and often, the biggest impact comes from the smallest changes. A tired, dated vanity light can really drag down the whole space, making it feel dim and uninviting. But swapping it out for a fresh, stylish fixture can instantly transform your bathroom, adding brightness and a touch of modern flair. You might think tackling an electrical project like this is beyond your skill set, but I’m here to tell you that learning how to install a bathroom vanity light is a very achievable DIY task for most homeowners. We’ll walk through the steps, ensuring you feel confident and safe throughout the process. It’s a project that doesn’t just improve your home’s look; it adds value and a sense of accomplishment.
Why Update Your Bathroom Vanity Light?
Beyond aesthetics, there are many practical reasons to consider a new vanity light. Older fixtures often provide poor illumination, casting harsh shadows or simply not offering enough light for daily tasks like shaving or applying makeup. Modern vanity lights are designed with better optics and often use more energy-efficient bulbs, giving you superior light quality while potentially lowering your electricity bill. It’s a win-win for both style and function.
Enhancing Your Bathroom’s Look
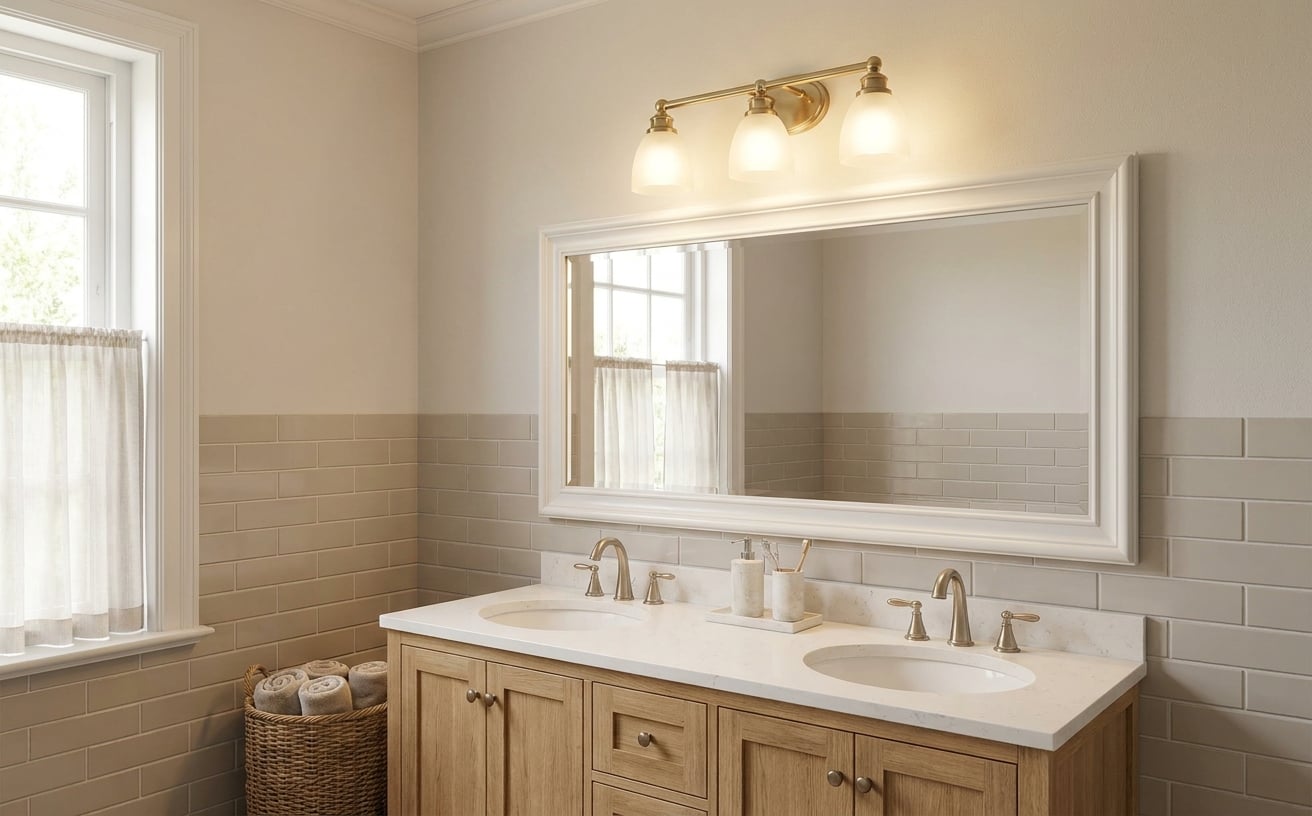
A well-chosen vanity light acts as a focal point, drawing the eye and complementing your mirror, sink, and cabinetry. Whether you’re aiming for a sleek, contemporary vibe or a more classic, traditional feel, the right fixture ties everything together. It’s an opportunity to inject personality into what can sometimes be a purely functional space.
Before You Begin: Planning and Preparation
Before you even think about unscrewing anything, a little planning goes a long way. This initial phase is crucial for a smooth installation and ensures you’ll love the end result.
Choosing the Right Vanity Light
This is where the fun begins! Think about the overall style of your bathroom. Is it farmhouse chic, minimalist modern, or something in between? Your new fixture should blend seamlessly.
- Size Matters: A common mistake I’ve seen is choosing a light that’s either too small or too large for the vanity. A good rule of thumb is that the fixture should be about 75% the width of your vanity or mirror, whichever is smaller. For a 36-inch vanity, aim for a light around 27 inches wide.
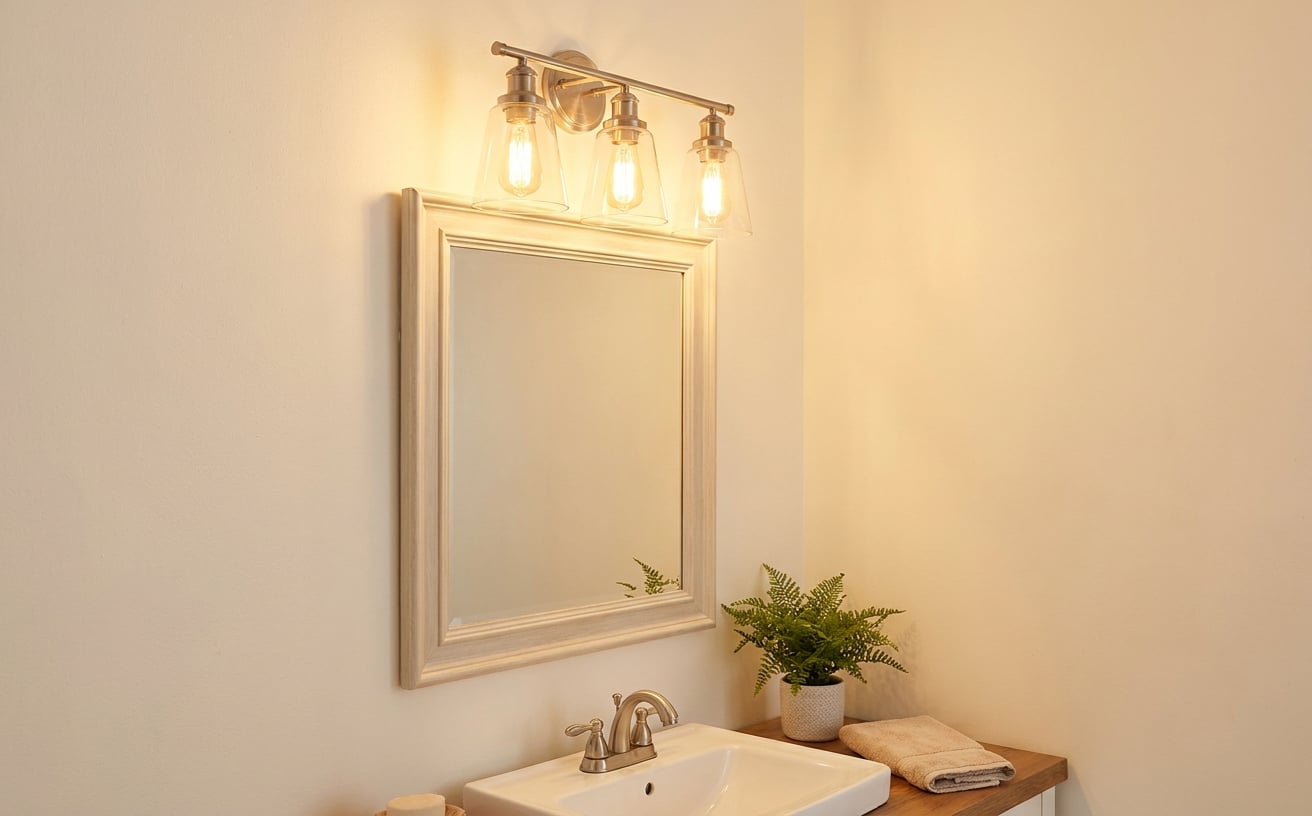
- Light Direction: Do you want uplighting, downlighting, or both? Uplighting can create a softer, diffused glow, while downlighting is more direct and brighter, ideal for task lighting. Many fixtures offer both.
- Bulb Type: Consider LED bulbs for energy efficiency and longevity. They come in various color temperatures, from warm white (2700K) to cool daylight (5000K), so you can pick what feels best for your space.
- Finish: Match the finish of your new light to other hardware in the bathroom, like faucet handles or cabinet pulls. Chrome, brushed nickel, matte black, and brass are all popular choices.
Expert Tip: When choosing light direction, consider your ceiling height. Uplights can make a lower ceiling feel a bit more expansive by bouncing light upwards, while downlights are very practical for direct task illumination right where you need it. For optimal makeup application, look for fixtures that provide even, diffused light without harsh shadows.
Gather Your Tools and Materials
Having everything ready before you start saves you trips to the garage or hardware store. You’ll need:
- New vanity light fixture
- Screwdriver set (Phillips and flathead)
- Wire strippers
- Voltage tester (non-contact is easiest)
- Pliers
- Electrical tape
- Wire nuts (usually come with the fixture)
- Step ladder
- Pencil
- Measuring tape
- Safety glasses
- Work gloves
Safety First: Shutting Off Power
This isn’t a step to rush. Working with electricity can be dangerous if you’re not careful. Before you touch any wires, you absolutely must cut the power to the fixture.
- Locate Your Breaker Panel: This is usually in a basement, garage, or utility closet.
- Identify the Correct Breaker: Look for the breaker labeled for your bathroom. If it’s not clearly marked, you might need to flip breakers one by one until the existing vanity light goes out.
- Flip the Breaker to OFF: Make sure it’s firmly in the off position.
- Test for Power: Use your voltage tester to confirm there’s no power at the light switch and at the fixture itself. You’ll want to touch the tester to the wires coming out of the wall where the fixture attaches. Never assume the power is off without testing it. In my experience, skipping this step is the number one error people make when working with electrical fixtures, and it’s simply not worth the risk. For any new wiring or if you’re uncomfortable at any point, I’d strongly recommend hiring a licensed electrician in your area. It’s truly worth every penny for peace of mind and knowing the job’s done correctly and safely.
Step-by-Step Guide to Install Your Bathroom Vanity Light
Now that you’ve got your tools, your new fixture, and you’ve safely cut the power, it’s time to get to work. Learning how to install a bathroom vanity light follows a pretty standard set of steps.
Removing the Old Fixture
This part is usually straightforward.
- Unscrew the Fixture: Most vanity lights are held to a mounting bracket with decorative nuts or screws. Carefully remove these.
- Lower the Fixture: Gently pull the old light away from the wall. It’ll still be connected by wires.
- Disconnect the Wires: You’ll see wire nuts connecting the fixture’s wires to the house’s wires. Unscrew these wire nuts (they twist off counter-clockwise). You’ll typically find:
- Black (hot) wire
- White (neutral) wire
- Bare copper or green (ground) wire
- Remove the Mounting Bracket: Once the wires are disconnected, you can usually unscrew the old mounting bracket from the electrical box in the wall. You won’t need this anymore.
Preparing the New Fixture to Install Your Bathroom Vanity Light
Your new vanity light will come with its own mounting bracket and hardware.
- Attach the New Mounting Bracket: Secure the new mounting bracket to the electrical box in the wall using the screws provided. Make sure it’s level and tightly fastened. This bracket is what your new light will hang from.
- Assemble Fixture Parts: Some fixtures come in multiple pieces. Follow the manufacturer’s instructions to assemble any arms, backplates, or other components before you try to wire it. It’s often easier to do this on a flat surface.
Wiring Up Your New Vanity Light
This is the most critical part of the installation. Don’t rush it.
- Identify Wires: Again, you’ll have black, white, and a ground wire coming from both your new fixture and from the wall.
- Connect Ground Wires: Take the bare copper or green ground wire from the fixture and connect it to the bare copper or green ground wire from the wall. Twist them together securely, then cap them with a wire nut. If there’s a green ground screw on the mounting bracket, you might also connect the fixture’s ground wire to that, too.
- Connect Neutral Wires: Connect the white wire from the fixture to the white wire from the wall. Twist them together firmly and cap with a wire nut.
- Connect Hot Wires: Connect the black wire from the fixture to the black wire from the wall. Twist them together firmly and cap with a wire nut.
- Tuck Wires: Carefully push the connected wires back into the electrical box, making sure no bare wire is exposed outside the wire nuts. You don’t want any wires pinched when you mount the fixture.
Expert Tip: When twisting wires together before adding a wire nut, use pliers to give them a really tight, professional twist. This ensures a solid electrical connection that won’t loosen over time. Then, screw the wire nut on until it’s snug. A quick tug on each wire after the nut is on will confirm it’s secure.
If your home’s wiring doesn’t match these standard colors, or if you’re dealing with anything other than a simple one-for-one replacement, please consider calling a licensed electrician. It’s always best to have a professional handle complex electrical situations to ensure safety and compliance with local codes. They can ensure your new bathroom vanity light is installed perfectly.
Mounting the Fixture
With the wiring done, it’s time to secure your new light.
- Align and Attach: Carefully align the holes on the new fixture’s backplate with the screws or posts on the mounting bracket.
- Secure the Fixture: Use the decorative nuts or screws provided with your fixture to firmly attach it to the mounting bracket. Don’t overtighten, but make sure the fixture is flush against the wall and doesn’t wobble.
- Install Bulbs and Shades: Screw in your chosen light bulbs, then attach any glass shades or covers according to the manufacturer’s instructions.
Testing Your New Light
The moment of truth!
- Restore Power: Go back to your breaker panel and flip the breaker for your bathroom back to the ON position.
- Test the Light Switch: Flip your bathroom light switch. If everything’s connected correctly, your new vanity light should illuminate!
- Check for Issues: If it doesn’t turn on, or if it flickers, immediately turn off the power at the breaker again and re-check your wiring connections.
Troubleshooting Common Issues
Sometimes things don’t go perfectly the first time, and that’s okay. Here are a few common issues and what to check if your new bathroom vanity light isn’t working as expected.
- Light Doesn’t Turn On:
- Is the breaker on? Double-check.
- Are the bulbs screwed in tightly? Are they working bulbs? Try a known good bulb.
- Did you connect black to black, white to white, and ground to ground? Turn off the power and re-check all wire connections inside the electrical box. Make sure wire nuts are tight.
- Light Flickers:
- This often indicates a loose connection. Turn off the power and re-tighten all wire nuts, making sure the wires are twisted together firmly.
- Sometimes, flickering can also be caused by an incompatible dimmer switch. Check if your bulbs are dimmable and if your dimmer switch is rated for LED lights if that’s what you’re using.
- Fixture is Loose:
- Turn off the power and gently tighten the decorative screws or nuts holding the fixture to the mounting bracket. Ensure the mounting bracket itself is securely fastened to the electrical box.
I’ve seen these issues come up quite a bit, and usually, a careful re-check of the wiring with the power off solves most of them. Patience is key!
Finishing Touches and Enjoying Your New Look
Once your new bathroom vanity light is installed and working beautifully, take a moment to clean up your tools and any dust or debris from the installation. Step back and admire your handiwork. A new fixture makes such a difference in how a bathroom feels, and you’ve done it yourself! If you’re shopping for modern vanity lighting, our vanity lights collection has a range of options at different price points. Your updated bathroom will feel brighter, more modern, and much more inviting.
Frequently Asked Questions
How high should I install a bathroom vanity light?
Generally, the bottom edge of a vanity light fixture should be positioned about 75 to 80 inches from the floor. This usually places the center of the light roughly 6 to 8 inches above your mirror, ensuring the light illuminates your face evenly without casting harsh shadows. Adjust slightly based on your ceiling height and mirror size.
Can I install a vanity light over a mirror?
Yes, absolutely! Installing a vanity light directly over the mirror is a very common and effective placement. It provides excellent task lighting for grooming. Just make sure the light’s height allows for comfortable viewing in the mirror without obstructing your reflection or being too high to be effective.
What kind of bulbs should I use for a bathroom vanity light?
For bathroom vanity lights, you’ll want bulbs that provide good color rendering (high CRI) so your skin tones look natural. LED bulbs are an excellent choice for their energy efficiency and long lifespan. Consider a color temperature of 2700K to 3000K for a warm, inviting glow, or 3500K to 4000K for a brighter, more neutral task light.
What if the wires in my wall aren’t black, white, and green/copper?
In older homes, you might encounter different wire colors, like red, blue, or wires that are all the same color but have different markings. In these situations, it’s best to consult a licensed electrician. They can safely identify the hot, neutral, and ground wires and ensure your new fixture is connected correctly and safely according to current electrical codes.
Installing a new bathroom vanity light is a rewarding project that truly brightens up your space. With careful preparation and attention to detail, you can transform your bathroom with confidence. We hope this guide helps you create the beautiful, well-lit bathroom you’ve been dreaming of.