Wanting the clean, modern look of recessed lighting but feeling stuck because you don’t have an attic above your ceiling? It’s a really common problem, especially in older homes, basements, or first-floor rooms in multi-story houses. Many homeowners assume you can’t have recessed lights without easy attic access, but I’m here to tell you that’s not true. With the right planning and the right fixtures, you absolutely can achieve that sleek, integrated lighting design. We’ll show you exactly how to install recessed lighting no attic space required, making your lighting dreams a reality.
The No-Attic Challenge: Why Recessed Lighting Still Works
The biggest hurdle when you don’t have an attic is running new wiring and securing the light housing. Traditional recessed lights, often called “new construction” cans, are designed to be nailed or screwed to ceiling joists before the drywall goes up. Obviously, that’s not going to work for an existing ceiling. But don’t worry, manufacturers have figured this out. There are specific types of recessed lights designed for “remodel” situations, and even newer, ultra-slim options that make the process even simpler. For anything involving new wiring, or if you’re ever unsure about electrical work, I’d strongly recommend hiring a licensed electrician in your area. It’s truly worth every penny for peace of mind and safety.
Planning Your Recessed Lighting Layout
Before you even think about cutting holes, you’ll want a solid plan. Good layout makes all the difference in how your room looks and feels. Think about what you’re lighting: a general living space, a kitchen task area, or accenting a wall? This will dictate your spacing and the type of light you’ll need.
A common rule of thumb for general lighting in a living room is to space lights about 4-6 feet apart, and roughly 2-3 feet from the walls. For task areas like a kitchen counter, you’ll want them closer, maybe 2-3 feet apart, often directly over the counter edge. It’s helpful to draw your room’s layout on graph paper and mark where you think the lights should go.
How to Install for Optimal Room Brightness
When you’re planning, it’s not just about where to place them, but also how much light they’ll put out. This is where lumens come in. A typical living room might need 1,500-3,000 lumens total, depending on its size and how bright you like it. Kitchens often need more, sometimes 3,000-5,000 lumens. Your light fixtures will list their lumen output. Don’t just pick lights based on wattage; lumens are what really tell you how bright they’ll be.
Consider the beam angle too. A wider beam (around 60 degrees or more) is great for general ambient light, while a narrower beam (25-45 degrees) is better for accenting artwork or creating task lighting. You’ll find that a mix often works best for a layered lighting scheme.
Expert Tip: If you’re replacing an existing ceiling fixture, you can often use that junction box as your starting point for power. You’ll run new wires from there to your new recessed lights. This avoids having to run a new wire all the way back to your breaker panel, which is a much bigger job.
Choosing the Right Recessed Fixtures
This is where the “no attic” part really matters. You’ve got two main categories of fixtures that work well without attic access:
- Remodel Cans: These are traditional-looking recessed housings, but they come with spring-loaded clips that let you secure them directly to the drywall from below, rather than needing to attach to joists. They require a specific size hole (usually 6 inches or 4 inches in diameter) and still have a “can” that sits up in the ceiling. You’ll then install a trim kit and bulb.
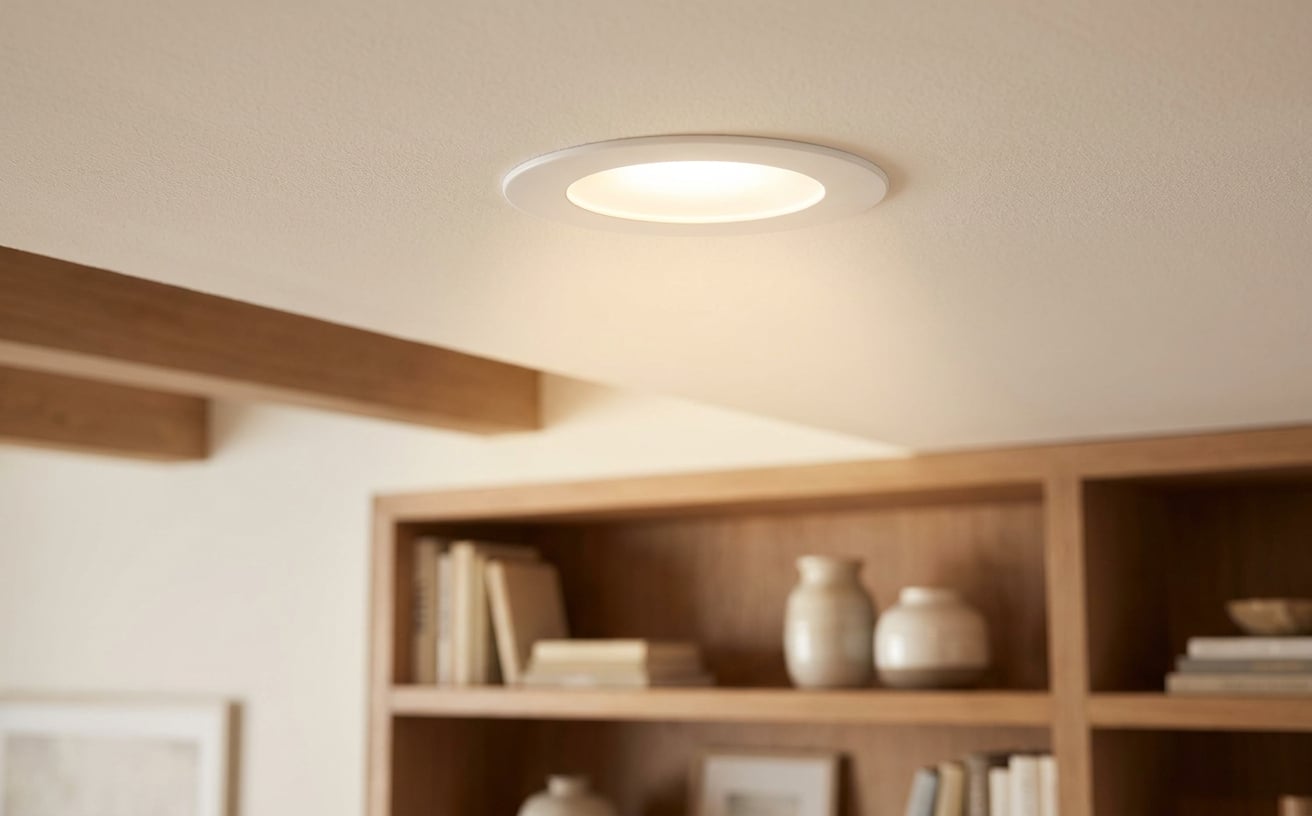
- Wafer/Slim LED Lights: These are a game-changer for no-attic installs. They’re incredibly thin, often less than an inch thick, and don’t have a bulky can. They’re self-contained LED units that connect to a small junction box (driver) which usually fits right through the cut-out hole and rests on top of the drywall. They also secure with spring clips.
| Pros of Wafer/Slim LEDs | Cons of Wafer/Slim LEDs |
|---|---|
| Ultra-thin, fit in tight spaces | Light color (CCT) usually fixed |
| No separate bulb needed | Not easily replaceable if LED fails |
| Easier to install | Design options are more limited |
| Often IC-rated and air-tight | May feel less “substantial” |
| Pros of Remodel Cans | Cons of Remodel Cans |
|---|---|
| Can replace bulbs easily | Thicker, need more ceiling depth |
| Wider variety of trim styles | Slightly harder to install |
| Often IC-rated and air-tight | Can be bulkier in the ceiling |
When selecting any recessed lighting, you’ll want to make sure they are IC-rated. This means they’re safe for direct contact with insulation. If they’re not IC-rated, you’ll need to maintain a clearance of at least 3 inches from any insulation, which can be tricky without attic access. Also, look for air-tight (AT) rated fixtures. These prevent air from leaking into your ceiling, which can save you money on heating and cooling. If you’re shopping for recessed lighting, our wafer light collection has a range of options at different price points that are perfect for tight spaces.
Essential Tools and Materials You’ll Need
You’ll need a few specific tools to make this job go smoothly. Don’t skip these, they’ll save you a lot of frustration. Here’s what you’ll want to have on hand:
- Voltage Tester: Absolutely critical for safety. You’ll use this to confirm the power is off before you touch any wires.
- Drywall Saw or Hole Saw: A hole saw attachment for your drill is ideal for perfect, circular cutouts, especially for remodel cans. For wafer lights, a drywall saw or utility knife can work for the simpler, often smaller circular template.
- Stud Finder: To locate ceiling joists and avoid cutting into them or to ensure you’re placing lights between them.
- Fish Tape: Invaluable for running new electrical wires through existing walls or ceilings. It’s a long, flexible tape that you push through the ceiling, attach your wire to, and pull back.
- Wire Strippers/Cutters: For preparing your electrical wires.
- Screwdriver Set: Phillips and flathead.
- Pencil and Measuring Tape: For marking your layout.
- Safety Glasses and Gloves: Always protect your eyes and hands.
- Ladder: A sturdy one that lets you work comfortably at ceiling height.
- Electrical Wire: Typically 14/2 or 12/2 Romex (NM-B cable) with ground, depending on your circuit’s amperage. Check your local codes.
- Wire Nuts or Push-In Connectors: For safely joining electrical wires.
- The Recessed Lights: Your chosen fixtures.
What You’ll Need to How to Install Safely
Beyond the tools, safety is paramount. You’ll need to know which circuit breaker controls the power to the area you’re working in. Before you even think about touching wires, you’ll flip that breaker off and then double-check with your voltage tester that the power is indeed dead. I’ve seen this go wrong when someone assumes the correct breaker was flipped, so always test!
The Step-by-Step Guide: How to Install Recessed Lighting Without an Attic
Ready to tackle the project? Here’s how to install your new recessed lights:
-
Map Out Your Layout and Locate Joists:
- Using your measurements, mark the center point of each light fixture on your ceiling with a pencil.
- Use your stud finder to locate the ceiling joists. Mark them lightly. You’ll want to ensure your light fixture holes are between joists, not directly under them, unless you’re using very slim wafer lights that can sometimes squeeze in. For remodel cans, you absolutely must be between joists.
- Make sure your layout works around any joists you find. Adjust your marks if necessary.
-
Cut the Holes:
- For remodel cans, use the template provided with your fixture (or measure the hole size specified) and attach a hole saw to your drill. Carefully cut out the perfect circles.
- For wafer lights, they’ll come with a paper template. Trace the outline onto the ceiling and cut it out with a drywall saw or utility knife. Take your time to get clean cuts.
-
Run the Wiring:
- This is often the trickiest part when you don’t have attic access. If you’re starting from an existing junction box (like from an old ceiling fixture), remove the old fixture.
- From this starting point, use your fish tape to run new electrical wire (NM-B cable) to each of your new light locations. You’ll feed the tape into one hole, try to guide it to the next, attach the wire, and pull it back. This takes patience.
- You’ll likely be daisy-chaining the lights, meaning one wire runs from the power source to the first light, then another wire runs from the first light to the second, and so on. Remember to leave enough slack at each hole (about 6-8 inches) for making connections.
- For anything involving running new wires back to the breaker panel, or if you’re uncomfortable with this step, please consult a licensed electrician. It’s crucial for safety and code compliance.
How to Install the Wiring to the Fixtures
Once you’ve got your wires pulled to each opening, you’re ready to connect them.
- For Remodel Cans: Each can will have its own junction box attached. You’ll open this box, strip the ends of your electrical wires (black, white, and bare copper/ground), and connect them to the wires inside the fixture’s junction box using wire nuts or push-in connectors (black to black, white to white, ground to ground). Secure the junction box cover.
-
For Wafer Lights: These usually come with a separate driver/junction box. You’ll open this box, strip your electrical wires, and connect them to the incoming power wires in the driver box. Then, the wafer light itself simply plugs into the driver.
-
Secure the Fixtures:
- For Remodel Cans: Carefully push the can up into the ceiling hole. The spring-loaded clips will engage and hold the can firmly in place against the drywall.
- For Wafer Lights: Push the small driver box up through the hole so it rests on top of the drywall. Then, carefully push the wafer light itself into the hole. Its spring clips will pull it flush with the ceiling.
-
Test and Finish:
- Once all fixtures are installed and secured, go back to your breaker panel and turn the power back on.
- Test your new lights! If they all work, great job. If not, turn off the power immediately and re-check your connections.
- For remodel cans, now you’ll install your chosen trim kits and bulbs. Wafer lights are usually complete units.
- You might need to do some minor patching around the edges with spackle if your cuts weren’t perfect, then paint to match your ceiling.
Troubleshooting Common Issues
Even with careful planning, sometimes things don’t go perfectly. If your lights aren’t working:
- No power at all: Double-check the breaker. Is it truly flipped on? Test the outlet closest to the lights to confirm power is flowing.
- One light not working in a series: This usually means a loose connection at that specific fixture or the one before it. Turn off the power and re-check the wire nuts or connectors at that light’s junction box.
- Lights flickering: This can be a sign of a loose connection, or sometimes an incompatible dimmer switch. Make sure your dimmer is rated for LED lights if you’re using LED fixtures.
Frequently Asked Questions
Can I install recessed lighting in a plaster ceiling?
Yes, you can install recessed lighting in a plaster ceiling, but it’s a bit more challenging than drywall. Plaster is harder and more brittle, so you’ll need a good quality hole saw and extra care to prevent cracking the surrounding plaster. Wafer lights are often preferred for plaster due to their lighter weight and easier installation process.
Do I need a dimmer switch for my recessed lighting?
While not strictly necessary, a dimmer switch is highly recommended for recessed lighting. It allows you to adjust the brightness to suit different moods and activities, giving you more control over your room’s ambiance. Make sure to choose a dimmer that’s compatible with the type of bulbs or integrated LEDs you’re using.
How do I know where the ceiling joists are without an attic?
You’ll use a stud finder to locate ceiling joists. Run the stud finder across the ceiling where you plan to install your lights. It will beep or light up when it detects a joist. Mark these locations with a pencil so you can plan your light placement around them, ensuring your cuts fall between the joists.
What’s the maximum number of recessed lights I can put on one circuit?
The number of lights you can put on one circuit depends on the circuit’s amperage and the wattage of your fixtures. A typical 15-amp circuit can safely handle about 1,440 watts of continuous load, and a 20-amp circuit can handle 1,920 watts. Since modern LED recessed lights use very little power (often 10-15 watts each), you can usually put quite a few on a single circuit. Always stay within 80% of the circuit’s capacity for continuous use.
Installing recessed lighting without attic access is a rewarding project that can dramatically update the look and feel of your home. With the right tools and a bit of patience, you’ll love the result. If you’re ready to start planning your perfect lighting design, take a look at our extensive collection of recessed lighting options.